
Elderberry syrup is amazing for us so why not take the process one simple step further and make gummies!
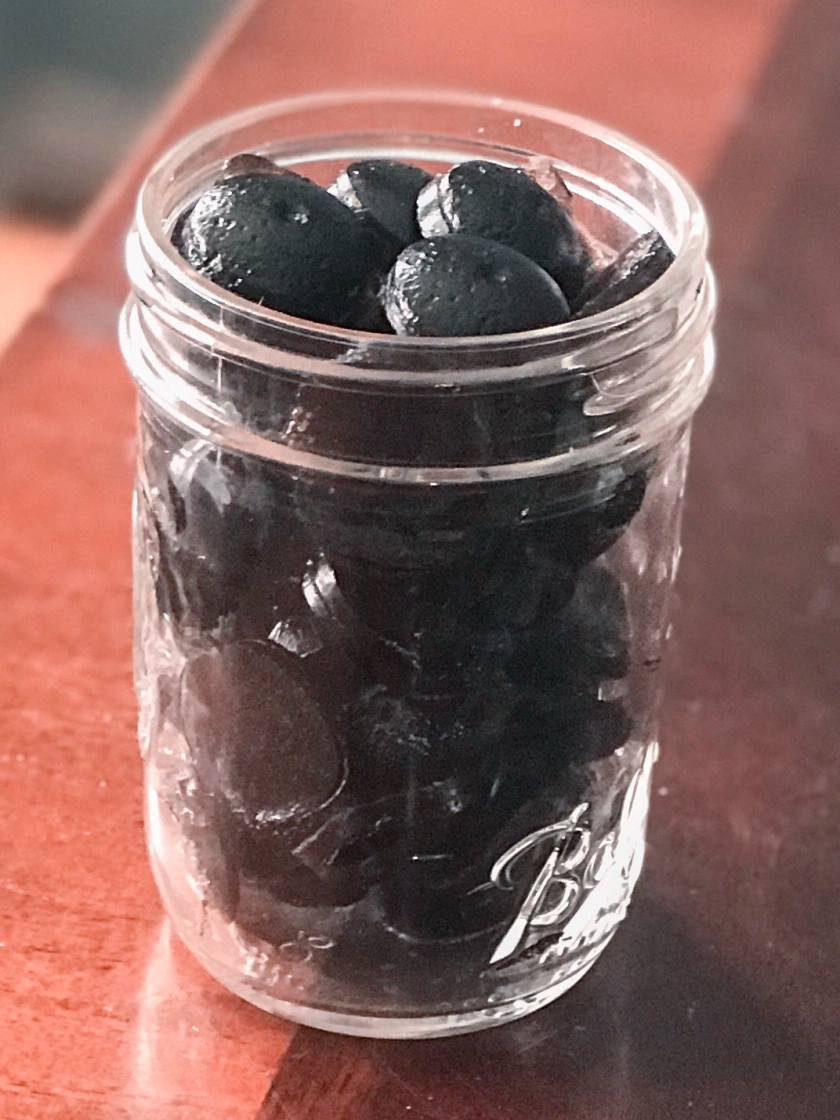
It is not as hard as you may think- it’s actually super simple.
All you need is 1 cup of your already amazing homemade Elderberry Syrup and a few other ingredients and it literally only takes about 5 minutes to make.
Elderberry Gummy’s Recipe
• Coconut oil to grease your silicone molds
• 1 cup of Elderberry syrup(we prefer homemade)
• 1/4 cup of unflavored gelatin
• 1/2 cup of hot but not boiling water
Mix up 1/4 cup of the Elderberry syrup with 1/4 cup of gelatin. Whisk together completely. Then add in 1/2 cup of hot water and mix.
Finally, add the remaining 3/4 cup of Elderberry syrup and combine completely.
Pour into greased silicone molds. Put the molds into the refrigerator until completely set up(this typically takes 1-2 hours).
Remove from the molds and store in an airtight container for up to 3 weeks(if they last that long-lol).
Here is a quick video showing just how easy it is!
I hope you enjoy these delicious immune-boosting treats!
God Bless!
Amanda
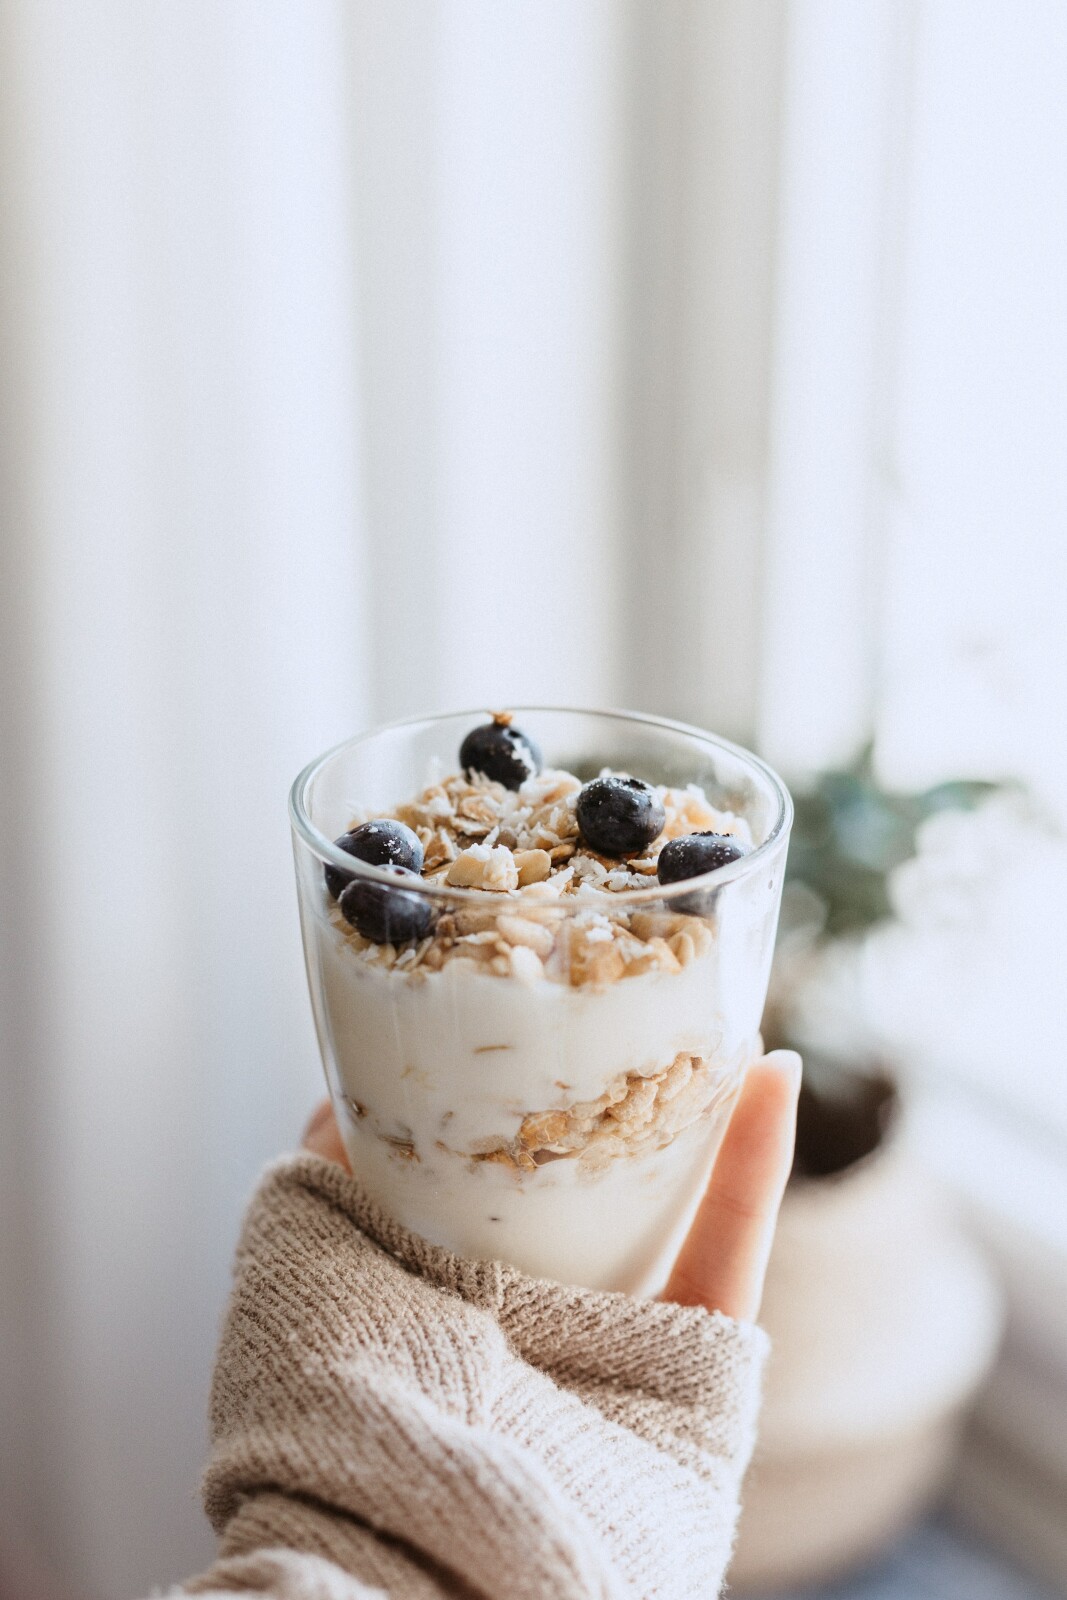
How to Make Yogurt
Making your own yogurt isn’t as hard as one may think. It is actually a very simple and easy thing to do plus you have the added benefit of knowing exactly what is in your yogurt.
There are two ways that I recommend making yogurt: the good old fashion way(aka stovetop) and the new-fangled way(aka in the Instant Pot). Both ways require two simple ingredients: milk(raw or store-bought but I recommend at least 2% or thicker) and a starter yogurt(plain yogurt or Greek yogurt)
The Old Fashion Way
Ingredients
1 gallon of milk- preferably raw or whole
8 oz of starter (plain yogurt or plain Greek yogurt)
Instructions
Heat milk in a stainless steel pan over medium heat until it reaches 165-185 degrees.
Cool, either by sitting on the counter or in a cool water bath until the temperature drops to 110 degrees.
Add culture-2 oz of starter (of yogurt from a previous batch, store-bought yogurt) per quart of milk(so 8 oz for a gallon). Gently stir just enough to incorporate into the milk.
Pour into mason jars and put the jars into the oven with the light on for 8-24 hours. I like to place in warm water (110-115 degrees) and put in the oven but some just place the jars in too. The light should provide a consistent heat of about 110 degrees.
Put jars into the refrigerator until the yogurt is cold and set.
Once the yogurt is set you can pour off the liquid whey from the top or strain the yogurt using cheesecloth for a thicker consistency(Greek yogurt).
Enjoy!
The New- Fangled Way
Ingredients
1 gallon of milk- preferably raw or whole
8 oz of starter (plain yogurt or plain Greek yogurt)
Instructions
Pour milk into Instant Pot(IP), hit yogurt button and then hit adjust until you select the “Boil” option
Walk away and it will shut off when it is done (magic!!)
Once it is done boiling, you can allow to cool on its own or put it in a cold water bath until the temperature is down to 110 degrees
Once the milk reaches 110 degrees you can gently add the starter yogurt
Again select the yogurt button and adjust it from “boil” to anywhere from 8-24 hours.
Once the allotted time is up, put yogurt into mason jars and allow it to cool and set up in the refrigerator.
Once the yogurt is set you can pour off the liquid whey from the top or strain the yogurt using cheesecloth for a thicker consistency(Greek yogurt).
Enjoy!
God Bless!
Amanda

Everything Cream
Why is it called everything cream? Well because that’s exactly what it is!
This is our go-to, use it for all the things!
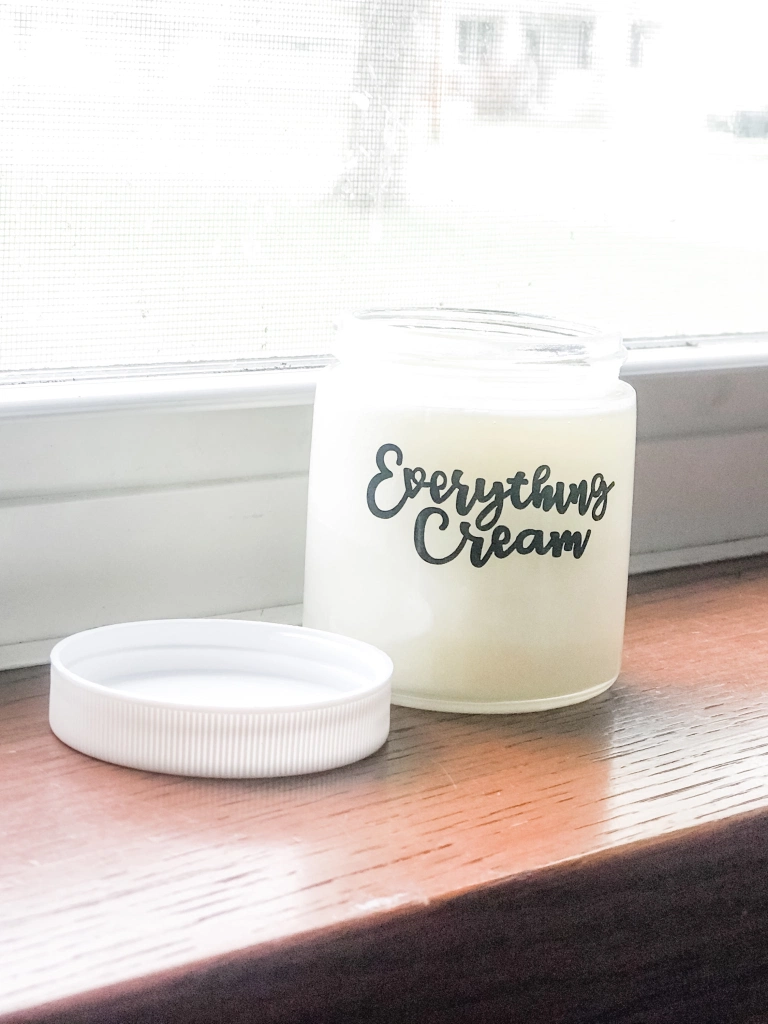
If you haven’t tried it, you will want it too!
Everything Cream
+ 4 Tbsp beeswax
+ 1 cup olive oil
+ 1 cup coconut oil
+ 1 tsp vitamin E oil
+ 12 drops lavender
+ 10 drops lemon
+ 8 drops tea tree/melaleuca
Simply melt your beeswax, coconut oil, olive oil, and vitamin E oil together. Allow to cool for 60 seconds and then add your essential oils.
It's super easy to make and you can watch and learn here as well!
It works for everything from diaper cream to cuts, scrapes, and more!
You are welcome and I hope this recipe finds you blessed!!
God Bless!
Amanda

DIY cooling mist & aftersun Spray
This has become a must-have in our home during the summer months
Especially when I am pregnant

Just a few simple ingredients and you are set to go!
DIY Cooling Mist & Aftersun Spray
2 oz spray bottle
4-6 drops YL peppermint essential oil (cools you down)
4 drops of YL lavender essential oils (soothes the skin)
1 tsp aloe Vera
2 Tbsp of witch hazel
water to the top and shake
Use this to keep you cool all summer long and soothe the skin after being in the sun a bit too long
God Bless!
After having over 1/2 a dozen kids, this is one thing that I wish I had known from the beginning
Popsicle pads! These are really a thing and they feel so good after you have birthed a baby!
They soothe the skin, help with swelling, and reduce your overall healing time plus they feel amazing!!!
Check out this quick video on how I do it here and the recipe below.
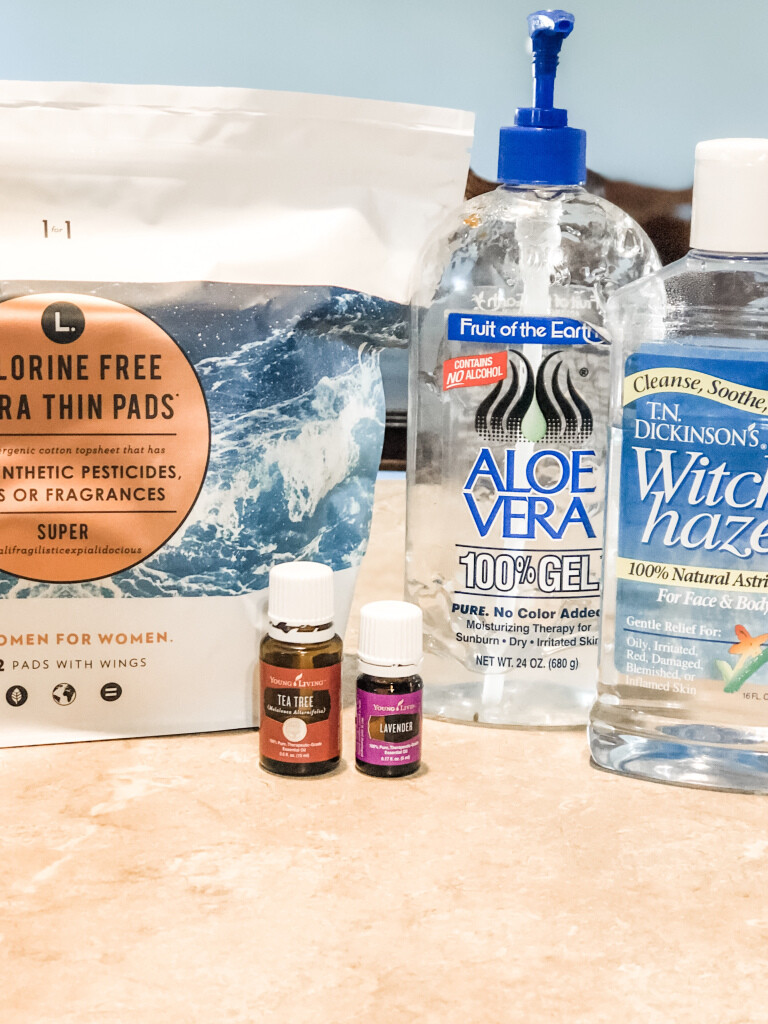
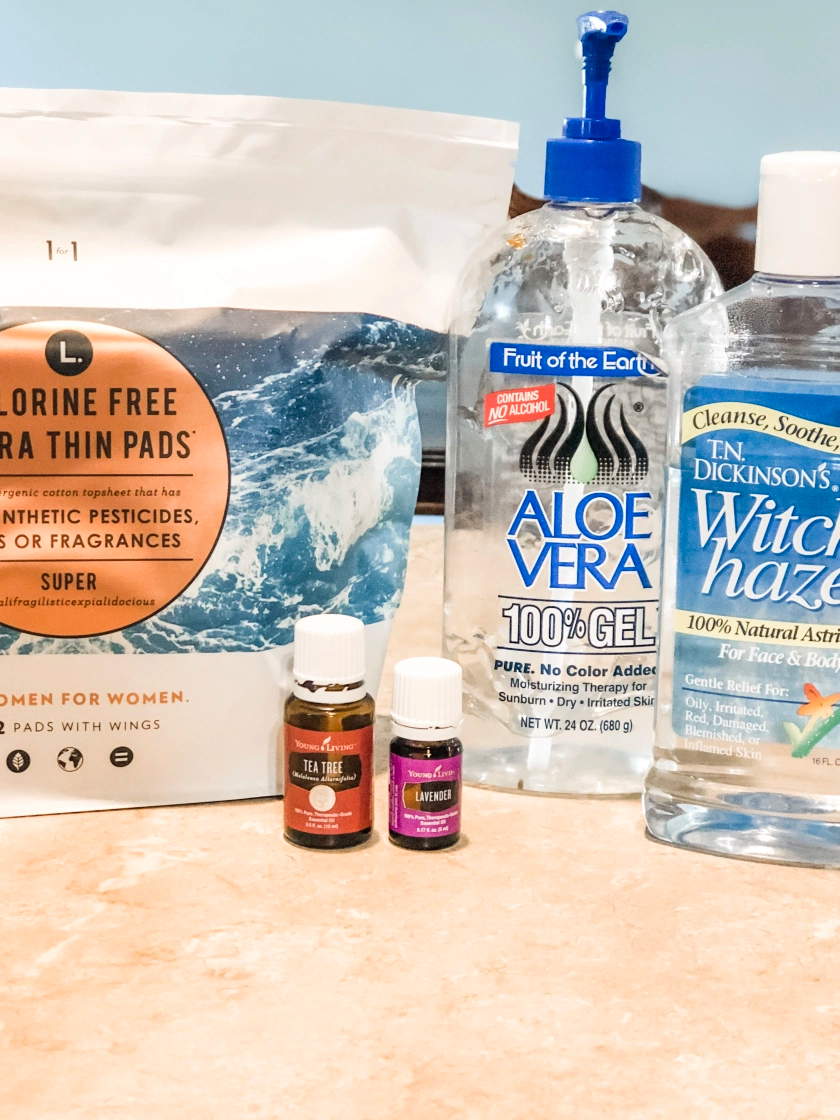
DIY Popsicle Pads for after baby comes
• 1 pad
• 1 Tbsp Aloe Vera(soothing to the skin)
• 1-2 drops of lavender
• 1-2 drops of tea tree
• 2 Tbsp witch hazel (cleansing & soothing)
Wrap the pad up and store it in the freezer!
Let me know if you have any questions
God Bless & Happy birthing!!