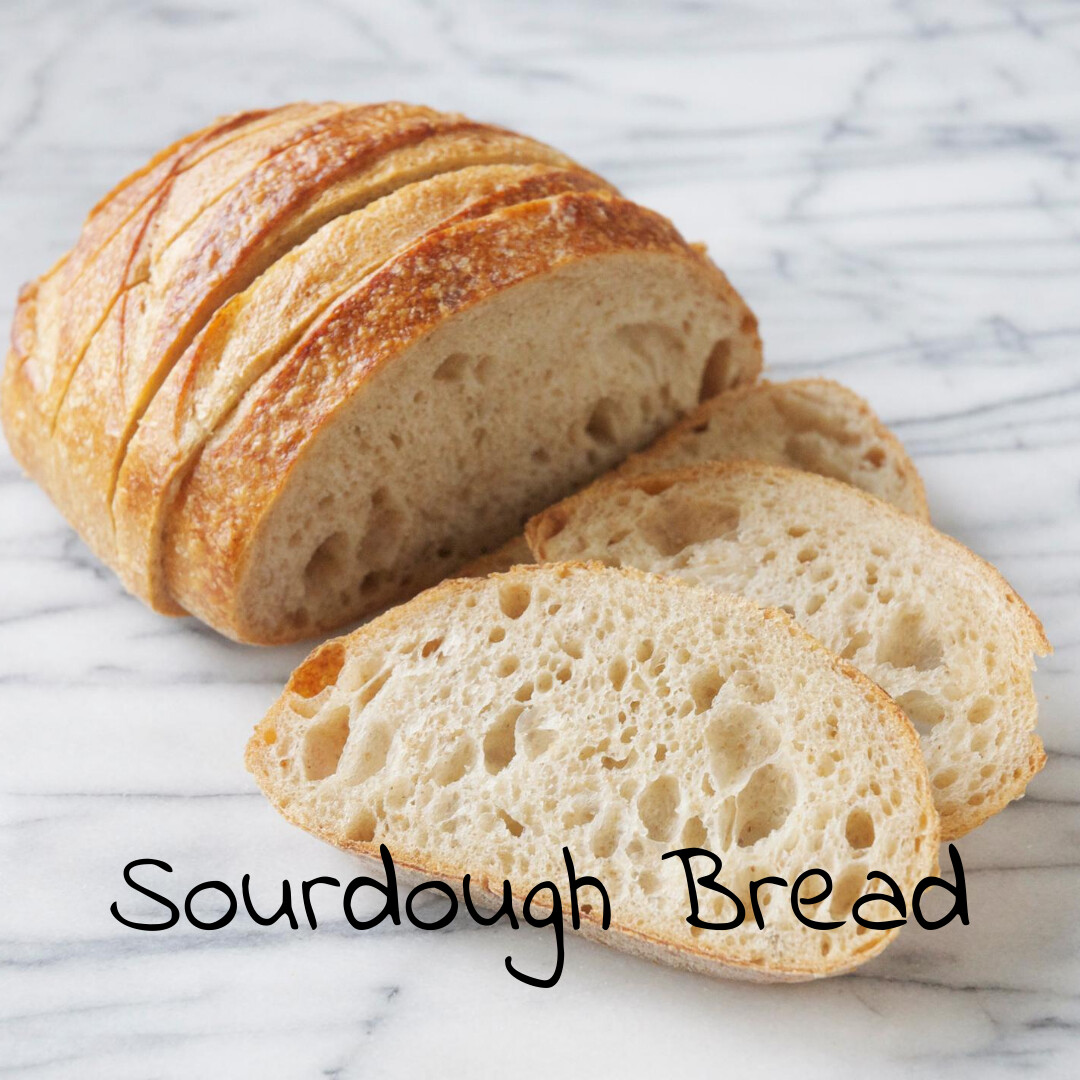
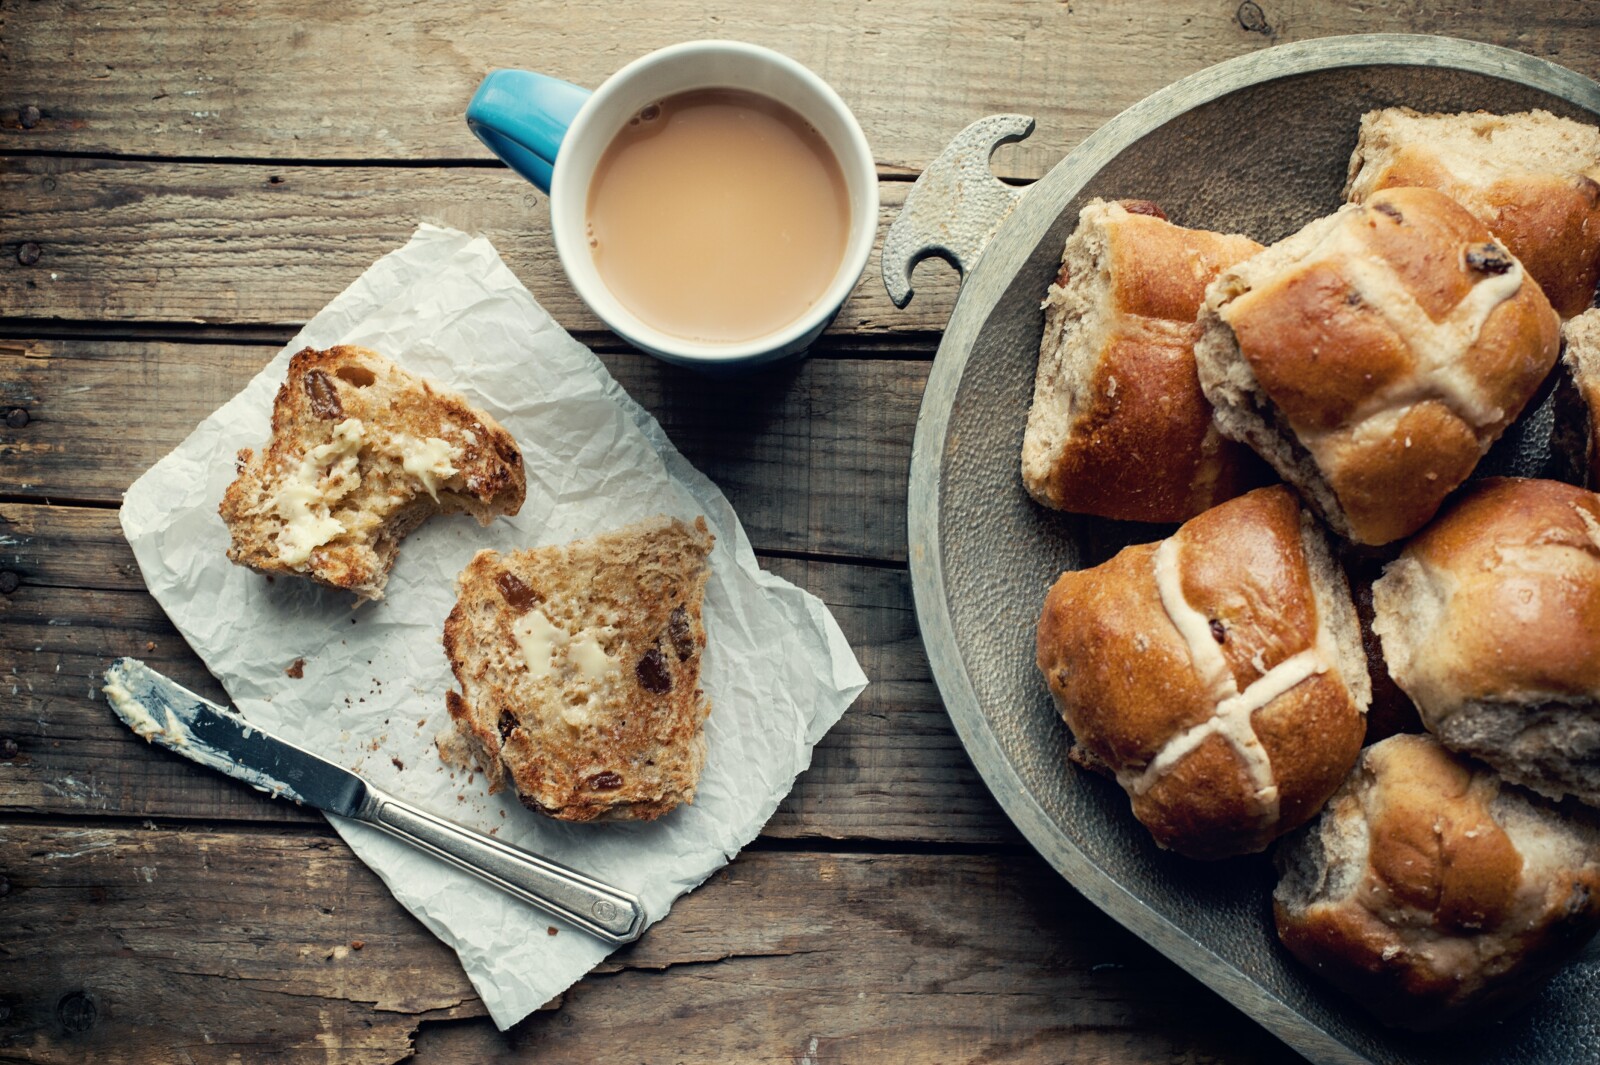
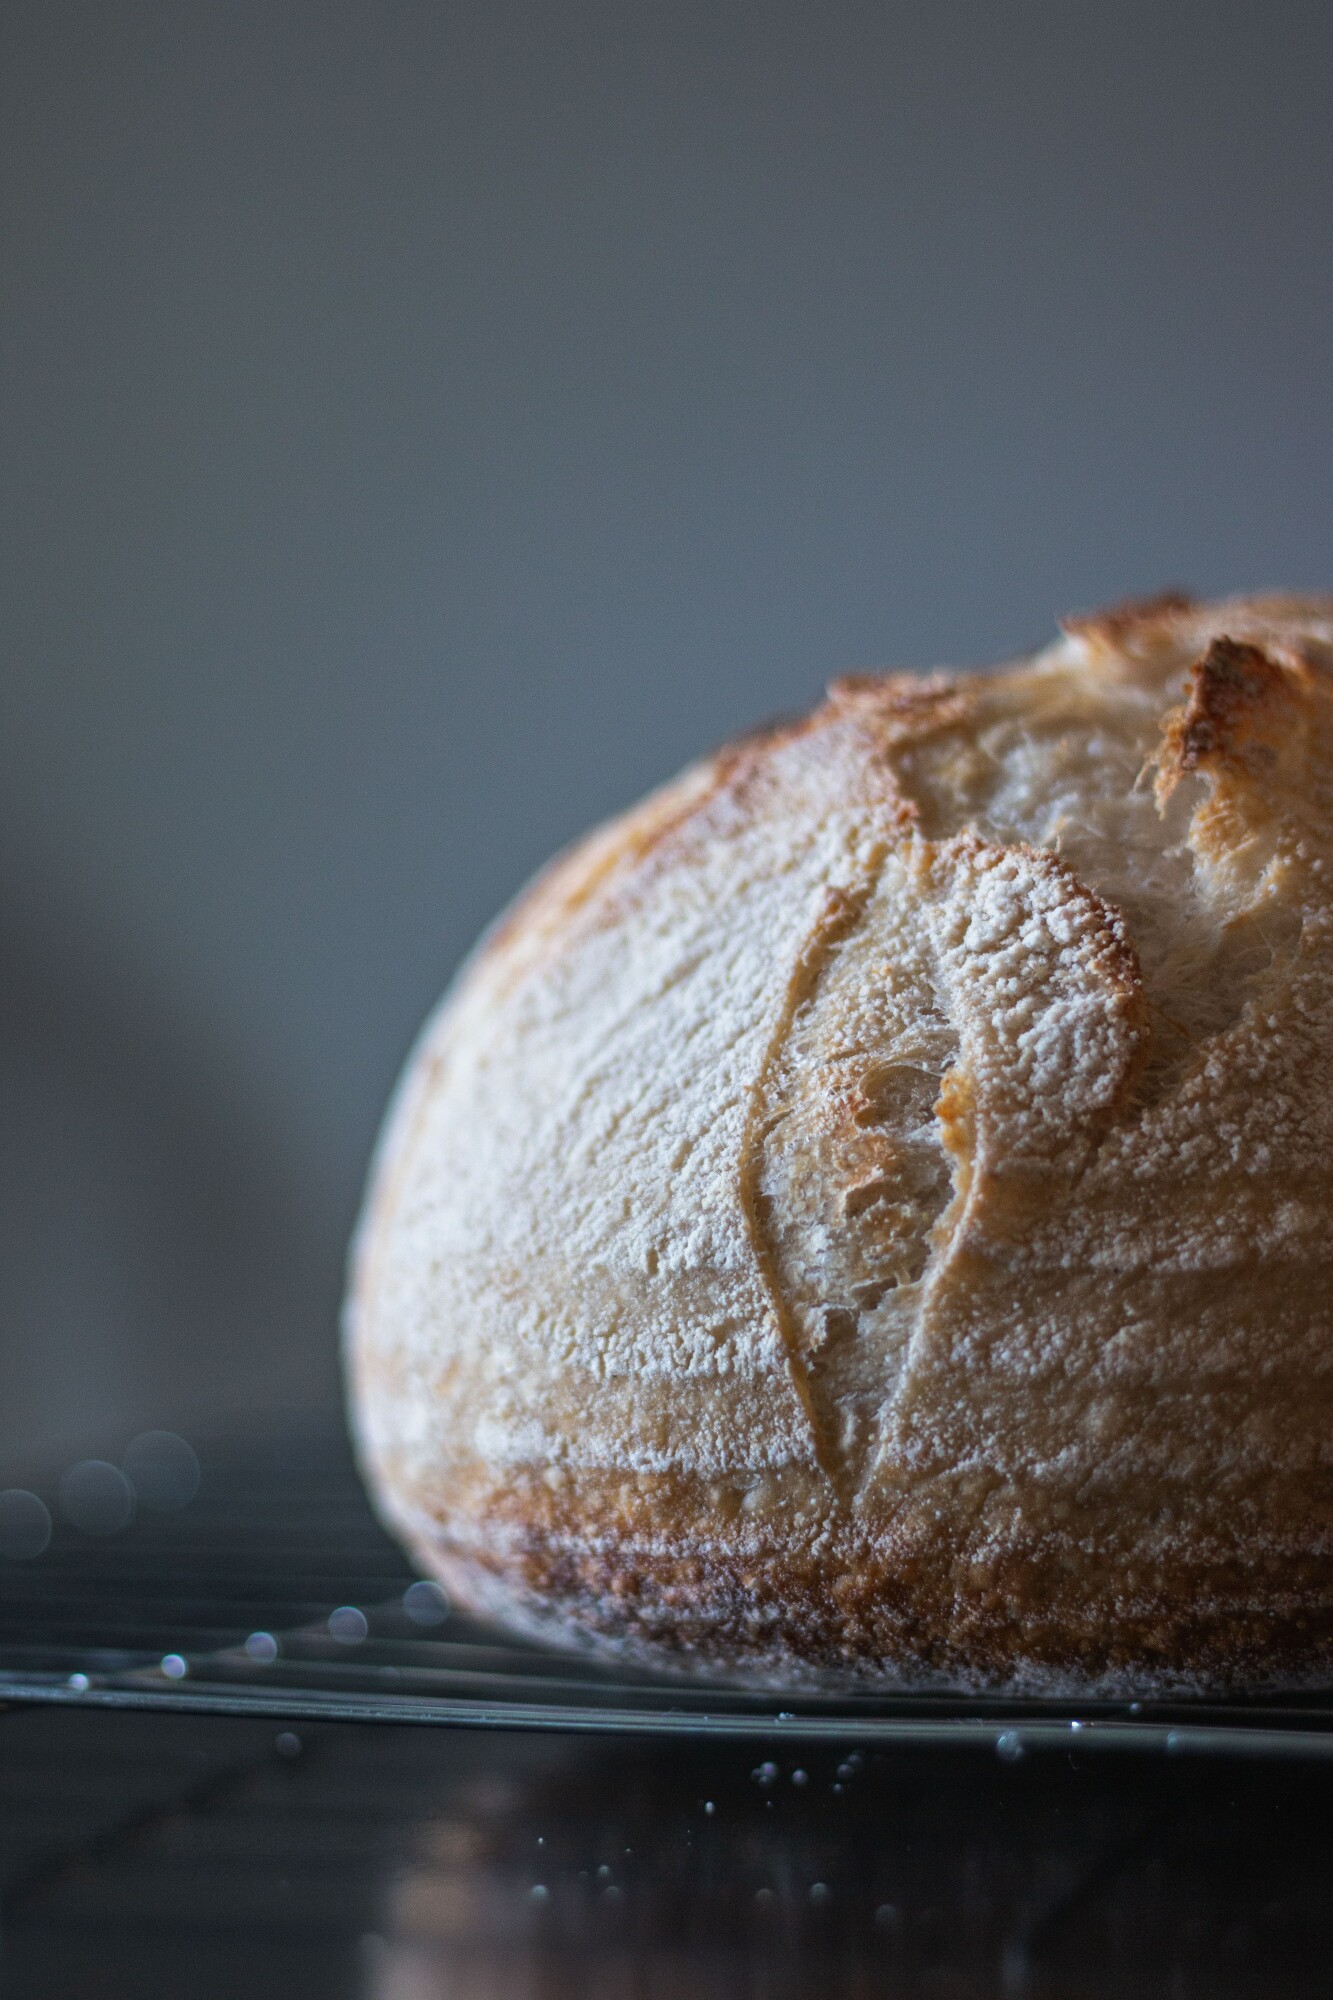
Sourdough bread… can you picture it? Fresh baked, just out of the oven. Slap a hunk of butter on it and watch it start to melt…sooooo good!
So why sourdough? What makes it better than other breads?
Well for starters, it's fermented. This gives it the prebiotic and probiotic benefits which are something we want to maintain a healthy gut. The naturally occurring yeast that is in wheat comes out when we mix the flour with some water and allow it to ferment at room temperature. As it ferments, it grows a culture that is similar to the culture found in yogurt (lactobacillus if we want to get all scientific). We “feed” our starter over the course of a week and allow that culture to grow. Once we have a good starter, we are ready to start making all of the sourdough goodies. You can make bread(obviously), as well as pizza, pancakes, buns and so much more.
Some of the additional benefits of sourdough are that you get more vitamins, minerals & antioxidants that your body can more readily absorb because of the fermentation process. It also makes gluten more digestible. This is super helpful for those with gluten sensitivities. It also tends to stay with you longer, meaning that you will be fuller for a longer period of time. The flour is soaked in the process of making sourdough bread(while you are letting it rest), so it does noes not cause the blood sugars to jump as regular bread does.
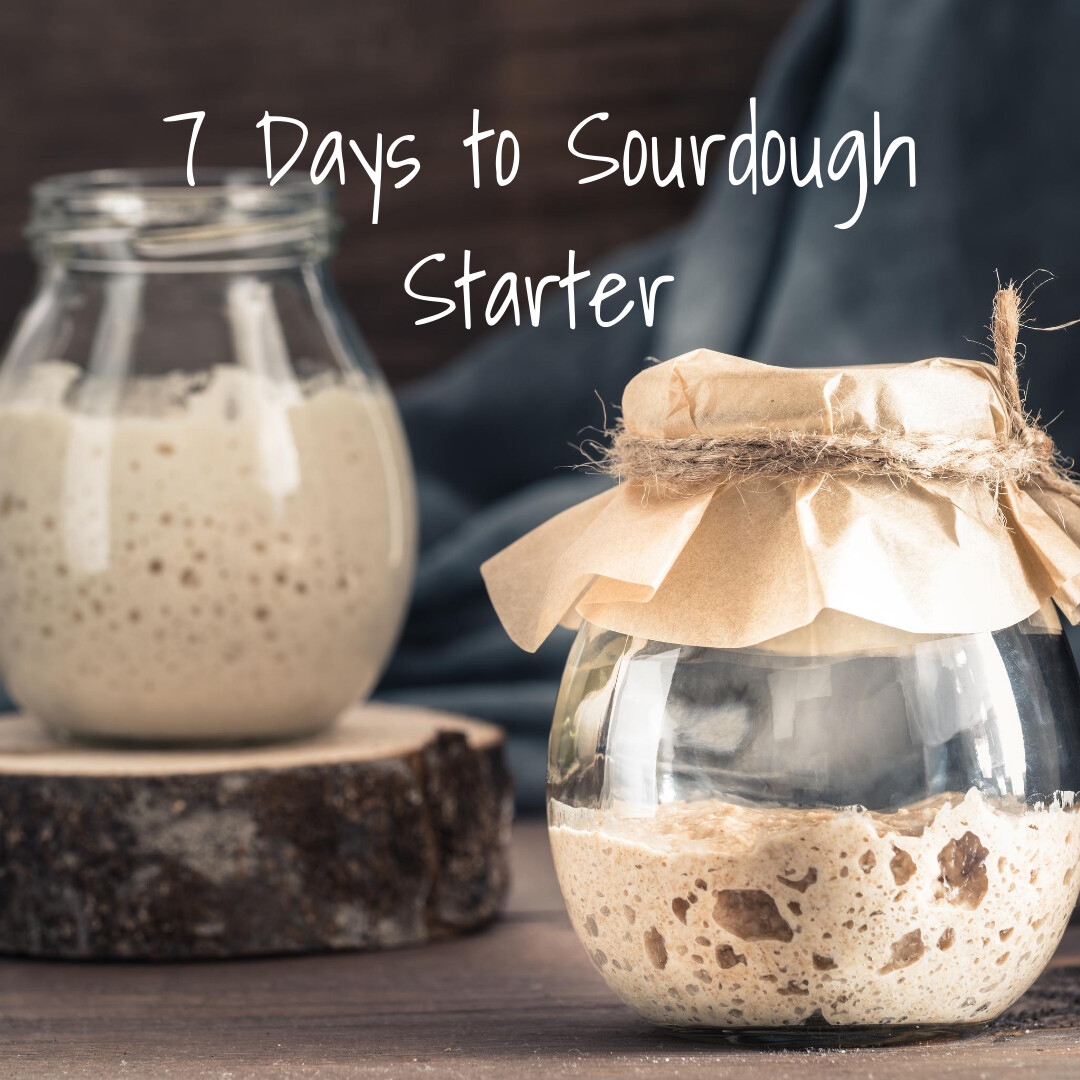
So now how hard is it to make this beloved sourdough? Well, first you need a starter(hope over to my Facebook group and follow along with our 7-day challenge). The starter is a fairly simple process that only takes a few minutes every day for 7 days and a few supplies. Grab yourself a kitchen scale, a mason jar, flour, and water, and you are ready to go. Once you have your starter, you are ready to start making all the sourdough goodness your family can handle.
Are you in? If you are ready to get started, hop on over to our Facebook community to start the 7 Day Sourdough Starter Challenge. Your family will thank you later, I promise!
God Bless!
Amanda
Amanda
So once upon a time, we were a family with occasional and sometimes daily issues. We almost didn't even notice how unhealthy we were until we started feeling so much better. We thought that it was normal to take medications every single day and that the little things that make life uncomfortable were normal. In walked homeopathy.
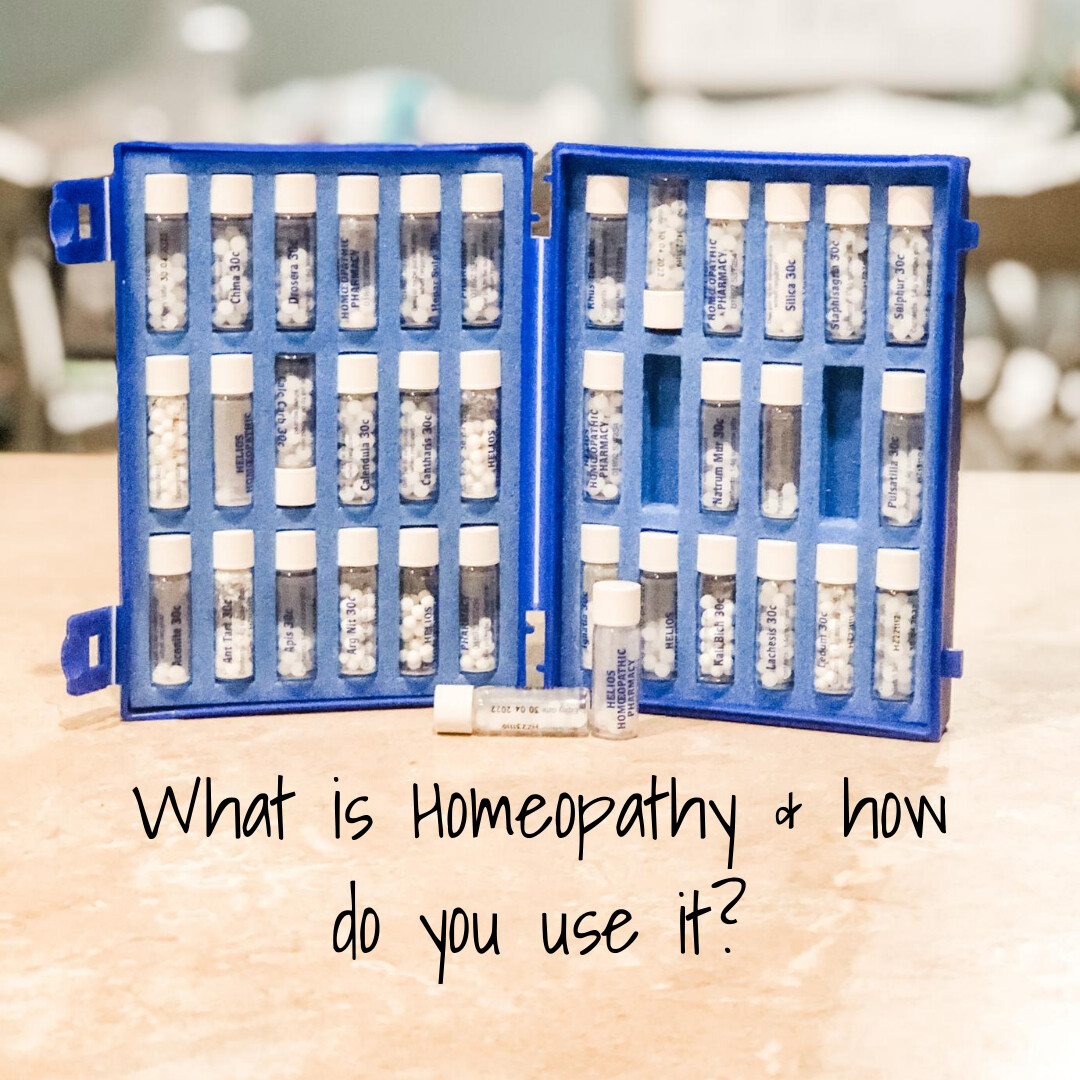
Homeopathy is the therapeutic method that uses highly diluted natural substances like flowers, minerals, and more, to relieve symptoms and not just cover them up. It was founded by Samuel Hahnemann in 1796. It operates under the premise that a substance that causes symptoms of a disease in healthy people would cure similar symptoms in sick people; this doctrine is called similia similibus curentur, or "like cures like".
In homeopathy, you use remedies. These remedies are made using homeopathic dilution. In this process, a chosen substance is repeatedly and thoroughly diluted. The diluted substance is then given on an as-needed base, not necessarily every 4-6 hours but as the body needs it. This is sometimes one of the hardest concepts for most people to process just because we are so used to the exact opposite.
I love the fact that I can give a remedy once and watch it work without the side effects that we had with OTC/pharmaceutical options. It has been an amazing addition to my mama toolbox! If you are looking for a quick kit to get started or you want an amazing travel kit this is the one we use. It has 36 of the most commonly used remedies, a nice little instructions booklet that allows you to look up the remedy or the issue and a perfect little carrying case that you can fit into your purse or diaper bag.
This is a quick low down on what homeopathy is and how we use it.
Have you tried homeopathy? Are you wanting to learn more?
Join my Free Facebook community to learn more about homeopathy and natural living https://bit.ly/WhollyHealthyMamas
God Bless!
Amanda

When we look at the grocery store, premade bars and snacks can be expensive and loaded with things that we might not really want in our home.
Energy bites are a favorite, quick snack(sometimes even a quick meal on the go) in our home.
The nice part about them is that this is a base recipe meaning that you can add in your favorite protein powder or swap out chocolate chips for nuts or raisins or even a healthy candy-coated chocolate :)
So lets get to it!
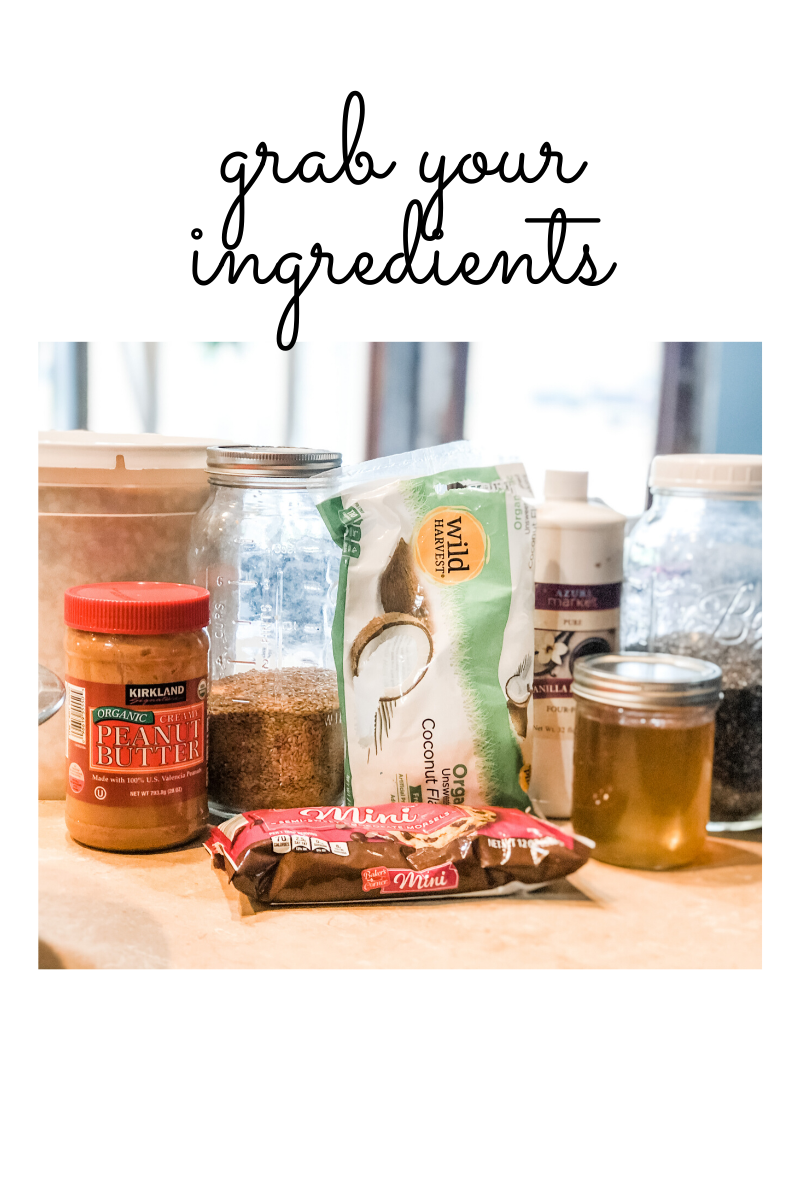
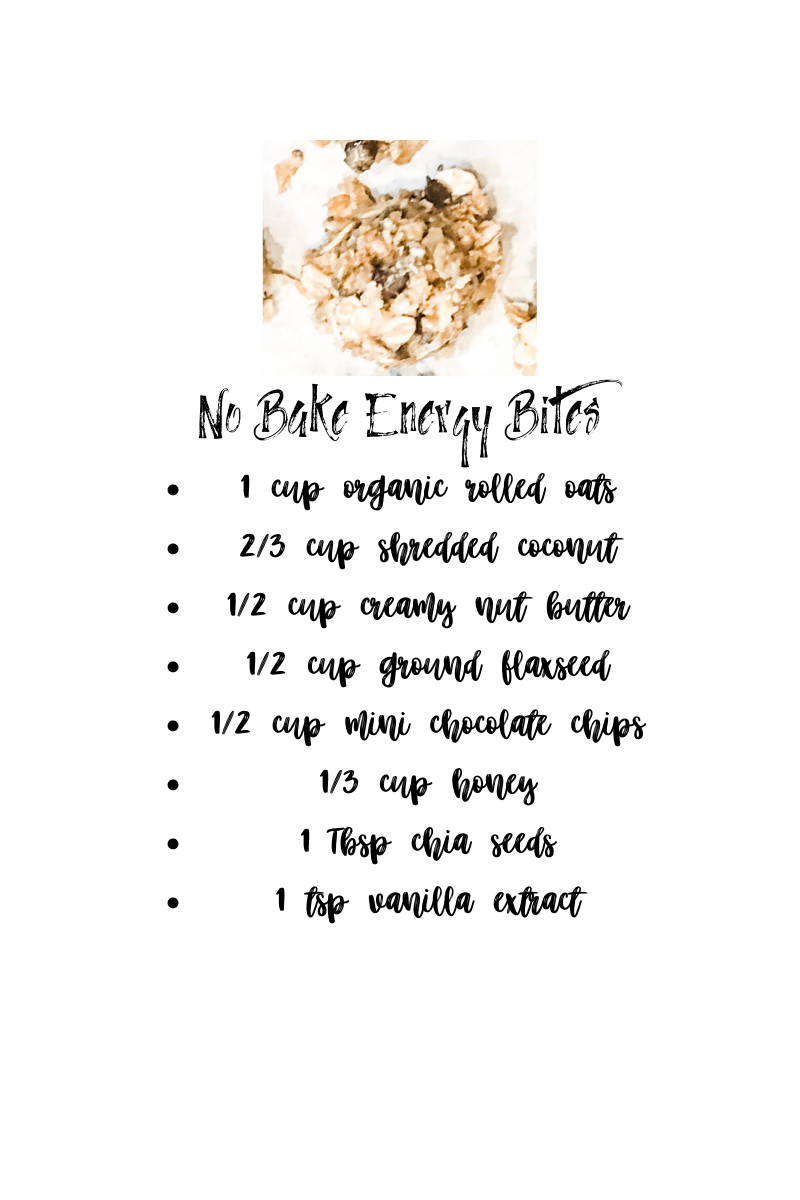
No-Bake Evergy Bites
* 1 cup organic rolled oats
* 2/3 cup organic shredded coconut flakes(unsweetened because the sweetened is loaded with things we don't want or need)
* 1/2 cup creamy nut butter(we prefer peanut butter)
* 1/2 cup ground flaxseed(healthy fiber or add in some protein powder)
* 1/2 cup mini chocolate chips(this can be left out or you can change it for something fun10
* 1/3 cup honey(raw is what we use)
* 1 Tbsp chia seeds(optional but so good that I think you should add it :) )
* 1 tsp vanilla extract
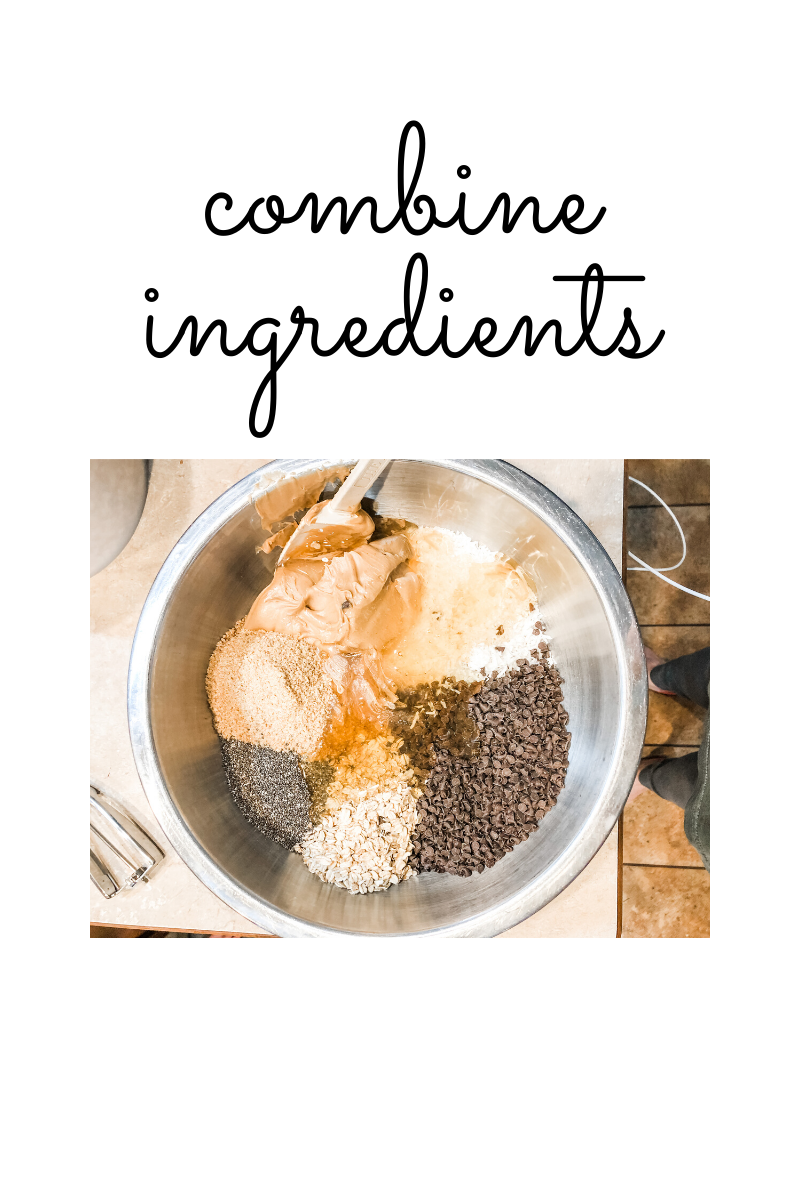
Go ahead and add all of these ingredients to a bowl and mix well!
We tend to make a 3x-4x a normal batch but we are feeding a small army plus they keep well in the freezer.

Once they are mixed well, you can roll or scoop them into 1 inch balls.
Place them on a cookie sheet(I line mine with parchment paper for easy clean up) and freeze them for 3-4 hours.
Then store in a ziplock baggie in the refrigerator or freezer for up to 6 months.
Okay, I literally laughed out loud because I am lucky if they last a week here!!
So there you have it a healthy and super easy recipe everyone in your house will love!
Some fun additions that we like to add are essential oils like cinnamon bark, clove, nutmeg & ginger.
Be creative!
For all my visual learners, check out the video below(p.s. these are amazing for labor)
Please share ways that you make energy bites! I am always looking for new ideas!!
God Bless!
Amanda

So, I do not wash my hair every day and have little tricks that help me to keep my hair manageable and not gross ;)
I do up days, dry shampoo, headbands, scalp treatments, and one of my summer favorites- beach waves!!
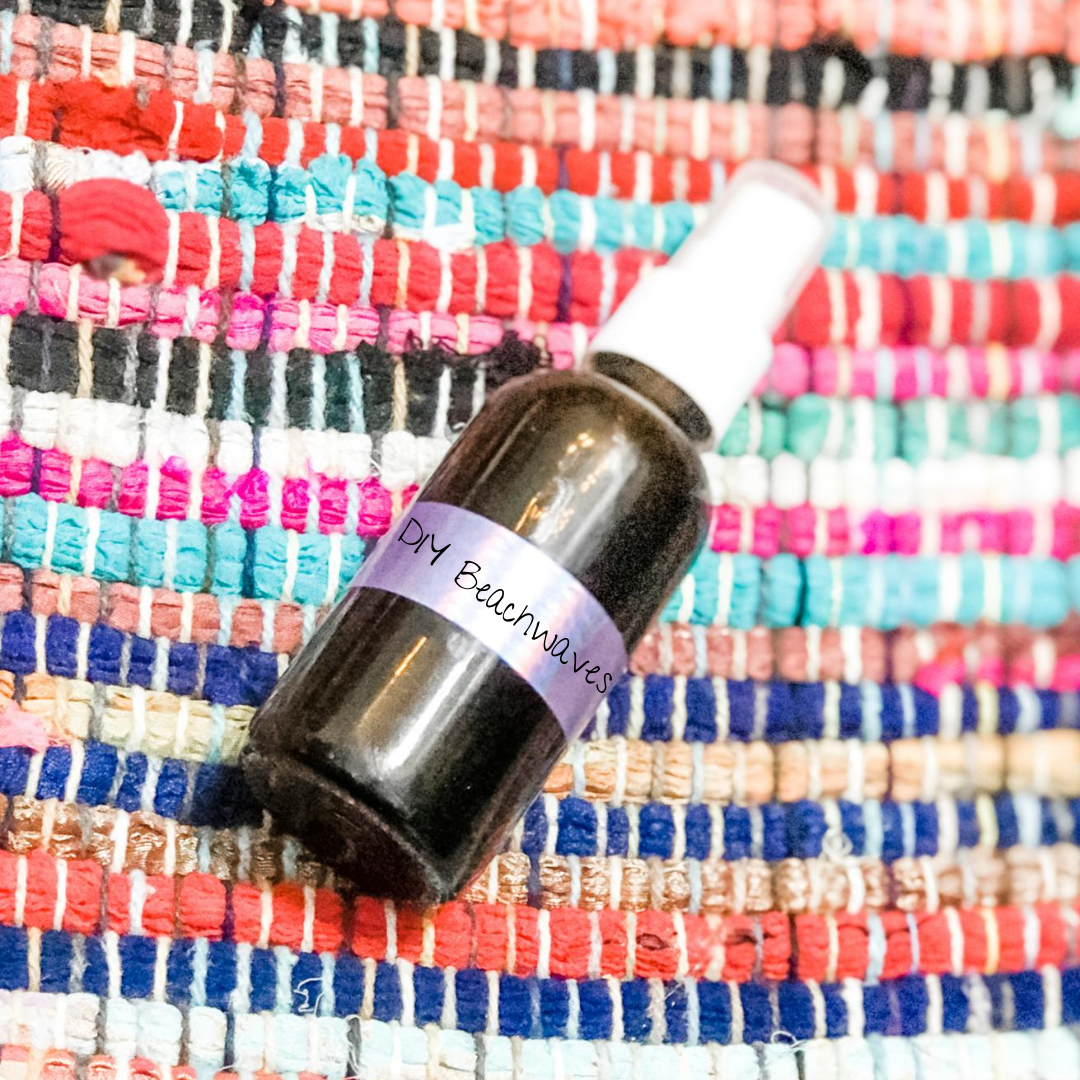
Beach waves are a nice non-toxic way to get a little bit of texture and hold for your hair.
Click here for a quick video on how I make it!
DIY Beach Waves (thank you for sharing this Lindsey Elmore)
This spray will give a bit of texture and manageability to hair.
Ingredients
* 1/4 teaspoon Epsom salt
* 1/4 teaspoon pink Himalayan salt
* 1/8 teaspoon citric acid
* 1 tablespoon vodka
* 1/2 teaspoon jojoba oil
* 1/4 teaspoon vitamin E oil
* purified water, hot but not boiling
* 4 drops cedarwood essential oil
* 4 drops bergamot essential oil
* 3 drops tangerine essential oil
* 2 drops spearmint essential oil
Instructions
1. Combine salts, citric acid, vodka, jojoba, and vitamin E oil in a small spray bottle.
2. Add hot water to almost fill the bottle. Attach sprayer and shake vigorously to dissolve salts.
3. Open the bottle and add essential oils.
To Use
1. Shake gently to incorporate before each use.
2. Spray generously on damp hair.
3. Scrunch hair with hands to encourage waves, and allow to air dry.
I just love what it does for my hair and hope that you do too!
God bless!
Amanda

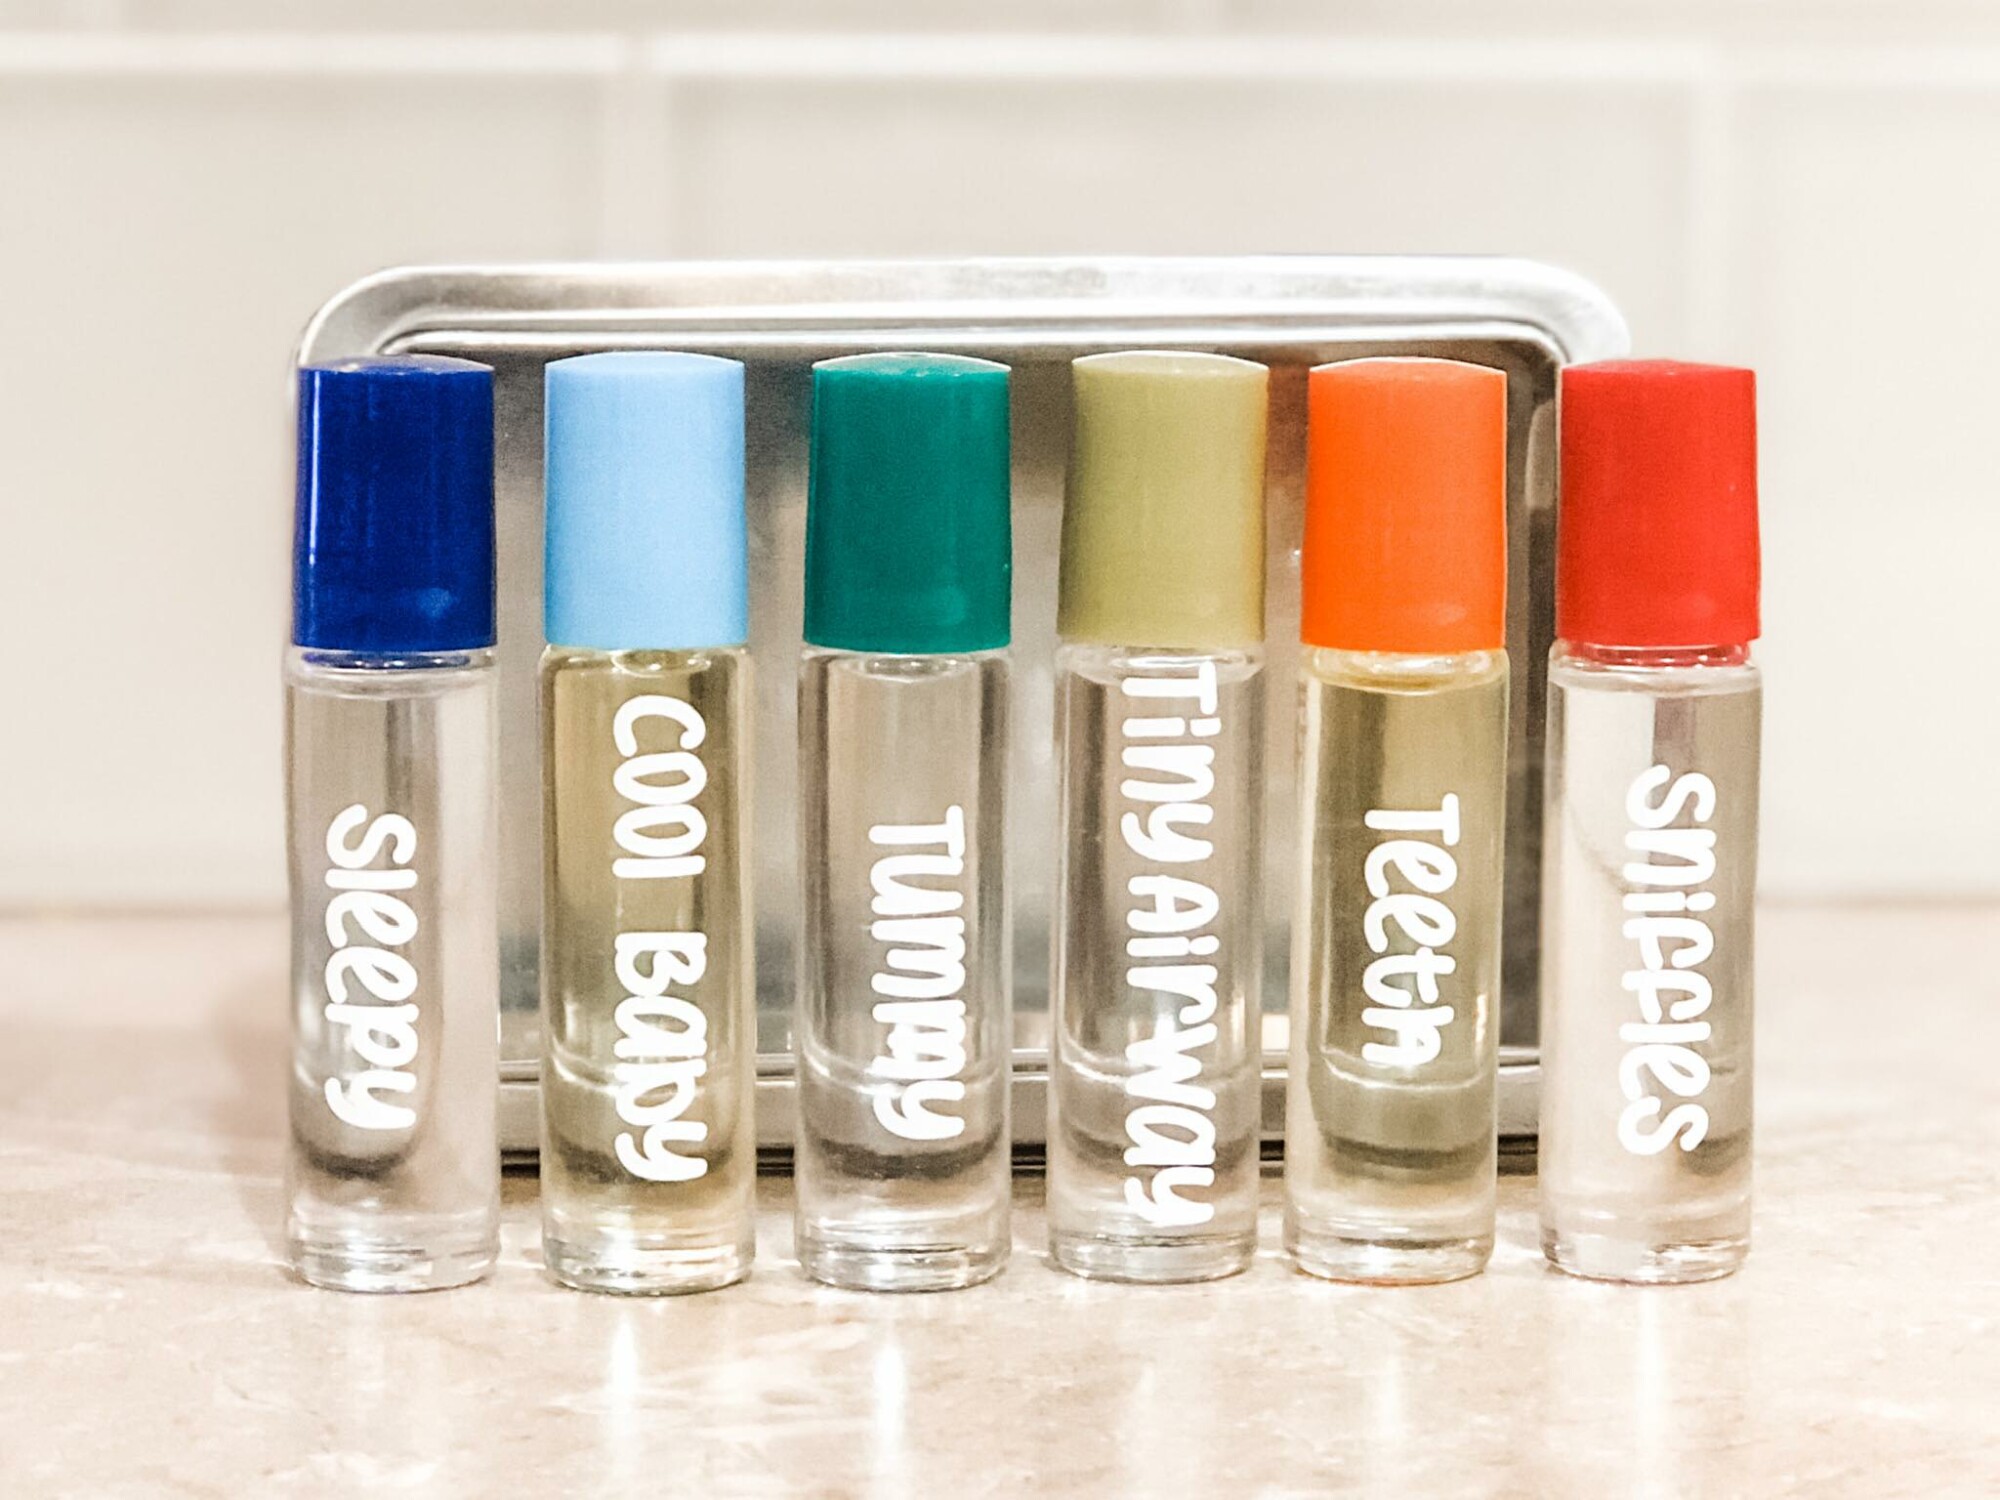
Roll-Ons for Baby
Sometimes the one thing that stops us from using something more natural is simply knowing how to use them. These roll-ons make using oils even on the littlest ones in our home simple and easy! Grab yourself some cute roller bottles from Amazon and your Young Living Essential oils(if you don't have them yet, let me help you).
These roll-ons will give you some quick tools to help you when you need it the most.
They also make an amazing baby gift!
For all of my visual learners, here is a video on how you can make the complete set on your own!
Babies Roller Bottle Kit
Sniffles(seasonal/sinus blend)
5 drops lavender
5 drop frankincense
5 drops lemon
Top with carrier oil
Apply to the bottoms of the feet, spine and under nose
Sleepy(sleep blend)
2-5 drops lavender
2-5 drop frankincense
Top with carrier oil
Apply to the bottoms of the feet and spine
Tummy(digestive blend)
2-4 drops cardamom
2-4 drops fennel
2-4 drop orange
Top with carrier oil
Apply to the bottoms of the feet and belly
Teeth(oral support roll on)
2-4 drop orange
2-4 drops copaiba
Top with carrier oil
Apply to the jaw line or gums
Cool Baby(body temp blend)
2-4 drops peppermint or copaiba
2-4 drops patchouli
Top with carrier oil
Apply to the bottoms of feet, spine, and naval
Tiny Airways(respiratory blend)
2-4 drops cardamom
2-4 drops frankincense
Top with carrier oil
Apply to the bottoms of the feet, spine and chest/back
Enjoy and stay well!
Blessings!
Amanda